Self-adhesive wall sticker 3D with photo slots - branch to the left side (height 106cm x width 190cm)

| Gross price | 41,91 PLN 45,07 PLN |
| Net price | 34,07 PLN 36,64 PLN |
| In stock |
|
| In cart | 0 |
| Quantity | Gross | Net |
|---|---|---|
| 1-19 | 41,91 PLN | 34,07 PLN |
| 20+ | 39,06 PLN | 31,76 PLN |
Add to shopping cart
| ID | 59482 |
| EAN | 5904041123900 |
| Weight | 0,250 kg |
| Weight with wrapping | 0,255 kg |
| Condition | New |
| Wrapping | Box |
Updated at:
Self-adhesive wall sticker 3D with photo slots - branch to the left side (height 106cm x width 190cm)
Do you want to change your interior, but you don't know how? Break the monotony and go for 3D wall stickers with photo frames.
Self-adhesive sticker in the shape of a branch with photo frames. The set includes 8 frames in the size of 10cm x 15cm. Frames can be hung voluntarily creating your own composition. The self-adhesive sticker is made of acrylic with a mirror effect. Self-adhesive decoration with photo frames is a modern and original decoration of your living room that will delight every guest. Create a wall-mounted, unique family album with the help of a wall sticker with frames.
Thanks to our product, you will see how little you need to achieve beautiful, satisfying results. They can change the character of the interior, regardless of the style of the room.
Key product features:
- a perfect addition to the living room, bedroom, corridor, children's room, kindergarten, restaurant, etc.
- you can easily give the interior a unique character,
- a sticker made of a color that does not fade and has a long life,
- maintains a long-lasting shine,
- can be glued to all flat surfaces, such as: walls, mirrors, windows, cabinets, tiles and metal,
- you can create a wall-mounted family album,
- extremely easy to use - remove the sticker from the sheet and stick it on the wall,
- resistant to moisture and sunlight,
Size: height: 106cm, width: 190cm
10 pieces of photo frames in size: 12.7 x 17.8 cm
User manual:
1.Carefully open the package
2. Stick the paper template on the wall. Please note the direction of the sticker.
3.Tear off the adhesive from the module.
4.Find a suitable item.
5. Tear off the paper template after pasting all modules.
6. Remove the protective film from the surface of the module.
You have this product?
Be first to submit a review and help others
You must be signed in to add a review
Recommended products

- EAN: 5902884107101
41,73 PLN
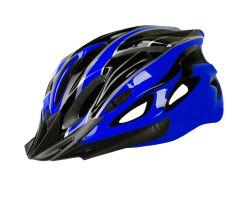
Universal helmet for bicycles - blue and black
- EAN: 5904041104091
41,89 PLN

Universal helmet for bicycles - red-black
- EAN: 5904041104084
41,89 PLN
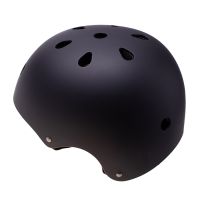
Adjustable helmet for a child on a bicycle / rollers - black, size M
- EAN: 5904041103964
55,94 PLN
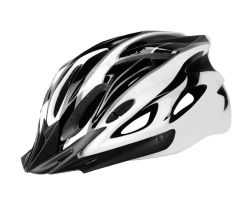
Universal helmet for bicycles - black and white
- EAN: 5904041104060
41,89 PLN
- EAN: 4003692290403
351,78 PLN